Extracting Table Information and Exporting to CSV in Dynamics 365 using X++ and TreeNode

Hello DAX DEV,

In this blog post, we’ll be diving into an X++ class called FNGTableInfoHelper Created to extracts information about tables with a specific prefix and without the “Staging” suffix. The class gathers specific details about these tables and their fields in Dynamics 365 Finance and Operations and exports the data to a CSV file using the TreeNode class.

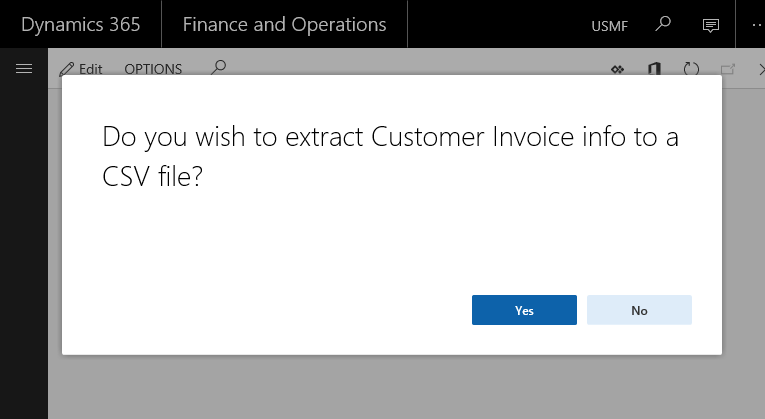
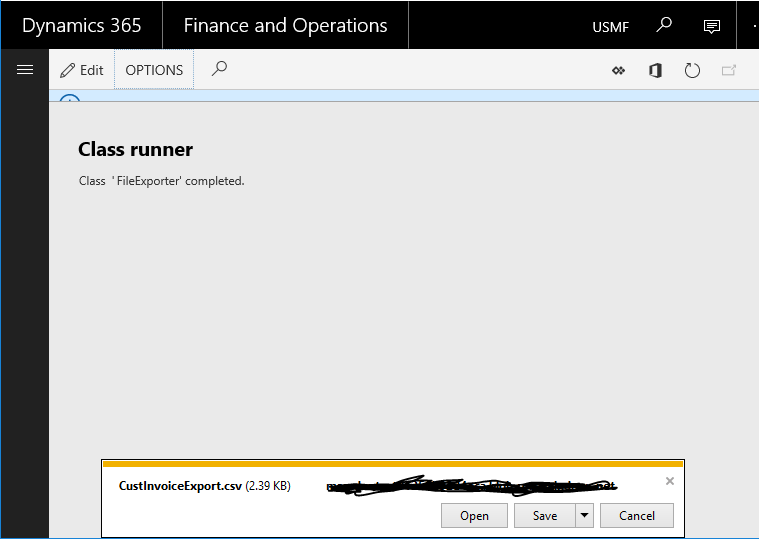
The class code is available in this blog post, hosted in github, To execute the class one should use SysClassRunner with the class name in the URL, the system will hang for a while to get the full list of tables than extracts table by table with the users ok, the result of the execution is a series of CSV files:

You’ll choose a directory and save the files. process takes 3-10 min depending on the amount of tables, in my case my 64 tables got extracted in less than 5m.

CSV Files are as following:

Below is an overview of the entire FNGTableInfoHelper class:
internal final class FNGTableInfoHelper
{
void showFieldInfo(TableId tableId)
{
int i,j;
SysDictType dictType;
SysDictEnum dictEnum;
commaStreamIo iO = commaStreamIo::constructForWrite();
filename filename = strFmt("%1.csv",tableId2PName(tableId));
DictTable dictTable = new DictTable(tableId);
DictField dictField;
str lastFieldName;
TableName tableName = dictTable.name();
FieldName fieldName;
str label;
container writingContainer;
str getEnumValues(DictEnum _dictEnum)
{
str ret;
int enumValue;
for (enumValue = 0; enumValue <= _dictEnum.values(); enumValue++)
{
str enumElement = strFmt("%1", _dictEnum.index2Symbol(enumValue));
str enumLabelId = strFmt("%1", _dictEnum.index2LabelId(enumValue));
str enumLabel = strFmt("%1", SysLabel::labelId2String(_dictEnum.index2LabelId(enumValue)));
ret += enumElement ? (strFmt(" [%1:%2-%3-%4] |", enumValue,enumElement,enumLabelId,enumLabel)) : "";
}
ret = subStr(ret,1, strLen(ret) - 2) + ")";
return ret;
}
str if_enum()
{
return (dictEnum == null ? "" : "Enum " + dictEnum.name() + ": ("+ getEnumValues(dictEnum));
}
void setTableHeaderInfo()
{
#Properties
TreeNode treeNode = TreeNode::findNode(@"\Data Dictionary\Tables").AOTfindChild(tableName);
iO.writeExp(["TableName:",tableName]);
iO.writeExp(["Label:",tableId2PName(tableId)]);
iO.writeExp(["ConfigurationKey:",treeNode.AOTgetProperty(#PropertyConfigurationKey)]);
iO.writeExp(["PrimaryIndex:",treeNode.AOTgetProperty(#PropertyPrimaryIndex)]);
iO.writeExp(["TitleField1:",treeNode.AOTgetProperty(#PropertyTitleField1)]);
iO.writeExp(["TitleField2:",treeNode.AOTgetProperty(#PropertyTitleField2)]);
iO.writeExp(conNull());
}
setTableHeaderInfo();
writingContainer = ["Number","Field Name","Label","Allow edit",
"Mandatory","Type","Help Text"];
iO.writeExp(writingContainer);
writingContainer = conNull();
dictField = dictTable.fieldObject(dictTable.fieldCnt2Id(i));
while (dictField)
{
i++;
lastFieldName = fieldName;
fieldName = dictField.name();
if (lastFieldName == fieldName)
{
break;
}
label = dictField.label();
if (!dictField.isSystem())
{
j++;
Types type = dictField.baseType();
str isMandatory = dictField.mandatory() ? "Yes" : "No";
str allEdit = dictField.allowEdit() ? "Yes" : "No";
dictType = new SysDictType(dictField.typeId());
dictEnum = new SysDictEnum(dictField.enumId());
str typeStr =
dictType == null
? if_enum()
: strFmt("%1 %2 %3",dictField.name(), type,
dictField.stringLen()
? strFmt("Len: %1", dictField.stringLen())
: if_enum());
writingContainer = [j,fieldName, label, allEdit, isMandatory, typeStr, dictField.help()];
iO.writeExp(writingContainer);
}
dictField = dictTable.fieldObject(dictTable.fieldCnt2Id(i));
}
System.IO.Stream stream = iO.getStream();
stream.Position = 0;
System.IO.StreamReader reader = new System.IO.StreamReader(stream);
str csvFileContent = reader.ReadToEnd();
File::SendStringAsFileToUser(csvFileContent, filename);
info(strFmt("CSV file %1 Sent to user", filename));
}
static FNGTableInfoHelper construct()
{
return new FNGTableInfoHelper();
}
public static void main(Args args)
{
void extract(tableName tableName)
{
str message = 'Extract field info of %1 Table';
if (box::yesNo(strFmt(message,tableName),DialogButton::Yes) == DialogButton::Yes)
{
FNGTableInfoHelper::construct().showFieldInfo(tableName2Id(tableName));
}
}
container tables = FNGTableInfoHelper::getFNGTables();// ["FNGJobTable","FNGJobLine","FNGJobServiceReports","FNGJobActivities","FNGCustomerAssetTable","FNGCustomerAssetJobTable","SalesTable","SalesLine"];
while (conLen(tables))
{
extract(conPeek(tables,1));
tables = condel(tables,1,1);
}
}
public static container getFNGTables()
{
TreeNode tablesNode = TreeNode::findNode(@"\Data Dictionary\Tables");
TreeNodeIterator iterator;
TreeNode tableNode;
container tableNames = conNull();
int i,time = timenow();
if (tablesNode)
{
iterator = tablesNode.AOTiterator();
tableNode = iterator.next();
while (tableNode)
{
str name = tableNode.AOTname();
int len =strLen(name);
str prefix = subStr(name,1,3), sufix = subStr(name, len - 6, 8);
if (prefix == "FNG" && sufix != "Staging")
{
tableNames = conIns(tableNames, conLen(tableNames) + 1, name);
}
tablesNode = null;
tableNode = iterator.next();
}
iterator = null;
}
str message = (strFmt("FNG tables collected in %1 sec",timeNow()-time));
info(message);
return tableNames;
}
}

Key methods in the class include:

  1. showFieldInfo(TableId tableId): This method extracts table and field information based on the given table ID, writes it to a CSV file, and sends the file to the user. The method uses the DictTable and DictField classes to access the table and field information. It also writes the table header information by calling the setTableHeaderInfo() method.
  2. getEnumValues(DictEnum _dictEnum): This is a nested method within showFieldInfo(). It takes a DictEnum object as an argument and returns a formatted string with all enumeration values and labels for the given enumeration object.
  3. if_enum(): Another nested method within showFieldInfo(). It checks if the dictEnum object is not null, and if so, it returns a formatted string containing the enumeration name and the result of calling getEnumValues(dictEnum).
  4. setTableHeaderInfo(): This nested method within showFieldInfo() retrieves and writes the table header information using the TreeNode class to navigate the Application Object Tree (AOT) and access table properties.
  5. construct(): This static method is a constructor for the FNGTableInfoHelper class. It returns a new instance of the FNGTableInfoHelper class.
  6. main(Args args): This static method is the entry point of the class. It defines a local method called extract() that takes a table name as an argument and calls showFieldInfo() with the table ID for the given table name. The main() method then loops through a container of FNG tables, calling the extract() method for each table.
  7. getFNGTables(): This static method retrieves all tables with the “FNG” prefix and without the “Staging” suffix. It uses the TreeNode class to navigate the AOT, collecting table names in a container. The method returns the container of table names.
  8. These methods work together to extract information about FNG tables and their fields, then export the data to a CSV file using the TreeNode class for AOT navigation.

The class’s entry point, main(Args args), calls the extract method for each table name in the tables container. The extract method uses the showFieldInfo method to get the table information and writes it to a CSV file.

The TreeNode class is used to navigate the Application Object Tree (AOT) and access table information. For example, in the setTableHeaderInfo() and getFNGTables() methods, TreeNode objects are used to find table nodes and retrieve the necessary properties.

With the help of the FNGTableInfoHelper class, you can easily generate CSV files containing information about specific tables in the Dynamics AX system. This can be particularly useful for developers and administrators working with Dynamics 365 Finance and Operations.

That’s all for today’s post. We hope you find the FNGTableInfoHelper class helpful for extracting table information and exporting it to CSV files in your Dynamics 365 projects. Happy coding!

Issue with Extended Style tabularFields Google Chrome (Resolved)

Hello Fin Ops Dev,

Recently I was asked to fix a design issue in one specific form, I noticed that the issue did not occur in our dev Environment I tried it on Google Chrome, and there it was the falting behavior the users complained about.

Internet Explorer:

Google Chrome:

The issue happens when using the Form Group Extended Style: tabularFields

This is the original microsoft code, in this case Form VendChangeProposal, responsible for showing the changes that are sent to Accounts payable Workflow “Proposed vendor changes workflow” (WF Type: VendTableChangeProposalWorkflow), Submited from VendTable form.

Our current code base has an extension of this form with 5 added groups before the footerGroup.

Solution

The idea consists in fixing the size of the groups & creating a new empty form group that will automaticaly resise and fill the missing area of the form without deforming the content.

First you have to create a group “BlankGroup” with the same cararteristics as the others, I’d suggest you duplicate the the last group.

Create an Static String under this new group, keep the Text Property as empty.

Now lets go to code, Create a new class, copy the following X++ code:

class VendChangeProposalFix
{
/// <summary>
/// Aligned the change proposal fields for Google Chrome
/// Code in X++, Ms Dynamics finances & operations, AxaptaHut, 07-Set-2021
/// </summary>
/// <param name="sender"></param>
/// <param name="e"></param>
[FormEventHandler(formStr(VendChangeProposal), FormEventType::Initialized)]
public static void VendChangeProposal_OnInitialized(xFormRun sender, FormEventArgs e)
{
int height = 5;
int heightMode = FormHeight::Manual;
void setControlProperty(FormGroupControl _groupControl)
{
_groupControl.heightMode(heightMode);
_groupControl.height(height);
}
setControlProperty(sender.design().controlName(formControlStr(VendChangeProposal, CaptionGroup)));
setControlProperty(sender.design().controlName(formControlStr(VendChangeProposal, HeadersGroup)));
setControlProperty(sender.design().controlName(formControlStr(VendChangeProposal, CreditMaxGroup)));
setControlProperty(sender.design().controlName(formControlStr(VendChangeProposal, NameGroup)));
setControlProperty(sender.design().controlName(formControlStr(VendChangeProposal, VendGroupGroup)));
setControlProperty(sender.design().controlName(formControlStr(VendChangeProposal, PaymModeGroup)));
setControlProperty(sender.design().controlName(formControlStr(VendChangeProposal, PaymSpecGroup)));
setControlProperty(sender.design().controlName(formControlStr(VendChangeProposal, VATNumGroup)));
setControlProperty(sender.design().controlName(formControlStr(VendChangeProposal, BankAccountGroup)));
setControlProperty(sender.design().controlName(formControlStr(VendChangeProposal, CashDiscGroup)));
setControlProperty(sender.design().controlName(formControlStr(VendChangeProposal, CreditRatingGroup)));
setControlProperty(sender.design().controlName(formControlStr(VendChangeProposal, PaymTermIdGroup)));
setControlProperty(sender.design().controlName(formControlStr(VendChangeProposal, InvoiceAccountGroup)));
setControlProperty(sender.design().controlName(formControlStr(VendChangeProposal, VendPriceToleranceGroupIdGroup)));
setControlProperty(sender.design().controlName(formControlStr(VendChangeProposal, PaymentDayGroup)));
setControlProperty(sender.design().controlName(formControlStr(VendChangeProposal, BSBNumberGroup)));
setControlProperty(sender.design().controlName(formControlStr(VendChangeProposal, AccountNumGroup)));
setControlProperty(sender.design().controlName(formControlStr(VendChangeProposal, PaymentDayGroup)));
setControlProperty(sender.design().controlName(formControlStr(VendChangeProposal, CustomerReference)));
setControlProperty(sender.design().controlName(formControlStr(VendChangeProposal, FooterGroup)));
}
}

This is the result across all browsers:

If done correctly, this solution should work without any issues.

Follow us and get exclusive AX DEV content.

Hope it might be helpful,
Thanks,
Felipe Nogueira

File Class D365/AX7 CSV Export X++

Hello DAX DEV,
Here’s a simple class doing a CSV file Construction and Export in Dynamics 365
The EDTs FilePath, FileNameSave, FileNameOpen are Obsolete in AX7, So creating dialog fields to manage the file info is no longer an option.

There is a new class called File to replace file handling.

unnamed1
unnamed2
unnamed3

This is the whole code exporting custInvoice Info to a CSV.

Notice how easy is it to send the file to the User
Line 46: File::SendStringAsFileToUser(str _csvFileContent, str _filename);

//Begin: Felipe Nogueira - AXAPTAHUT , Dec 17th 2018
class FileExporter
{
commaStreamIo iO;
custInvoiceTrans custInvoiceTrans;
Filename filename;
public static void main(Args args)
{
FileExporter fileExporter = new FileExporter();
fileExporter.run();
}
void new()
{
iO = commaStreamIo::constructForWrite();
filename = "CustInvoiceExport.csv";
}
void run()
{
if (Box::yesNo("Do you wish to extract Customer Invoice info to a CSV file?",DialogButton::Yes))
{
container header = ["Invoice number",
"Invoice Date",
"Item Id",
"Price",
"Qty",
"Line Amount"];
iO.writeExp(header);
header = conNull();
while select custInvoiceTrans
order by InvoiceId,LineNum
{
container line = [custInvoiceTrans.InvoiceId,
custInvoiceTrans.InvoiceDate,
custInvoiceTrans.ItemId,
custInvoiceTrans.SalesPrice,
custInvoiceTrans.Qty,
custInvoiceTrans.LineAmount];
iO.writeExp(line);
}
System.IO.Stream stream = iO.getStream();
stream.Position = 0;
System.IO.StreamReader reader = new System.IO.StreamReader(stream);
str csvFileContent = reader.ReadToEnd();
File::SendStringAsFileToUser(csvFileContent, filename);
info(strFmt("CSV file %1 Sent to user",filename ));
}
}
}
//End: Felipe Nogueira - AXAPTAHUT , Dec 17th 2018
view raw FileExporter.cs hosted with ❤ by GitHub

Follow us and get exclusive AX DEV content weekly


Augmented classes on Tables [ExtensionOf]

Recently I posted a Trick to create a display method on sys Tables using overlaying. In further researches, due to necessity, I bumped into a new and more robust way of doing the same.

The purpose of this post is to explain a possibility to facilitate the manipulation of Table Methods on Augmented classes.

Augmented classes are necessarily  Final classes defined by the use of the Attribute ExtensionOf on its declaration, in my example I’m augmenting the Table ProjForeCastOnAcc.

//Begin: Felipe Nogueira - AXAPTAHUT , Apr 9th 2018
[ExtensionOf(tableStr(ProjForecastOnAcc))]
final class ProjForecastOnAcc_Extension
{
}
//End: Felipe Nogueira - AXAPTAHUT , Apr 9th 2018

This allows us to interact with the class as if it were the actual table, So we have access to fields, methods, and properties from the original table.

I created this new display method on it, notice that at line ‘8’  of the following code, I’m mentioning one field from the original table by using the reserved word “this”, although the current object is not the actual table. All fields, methods, and properties from the original table can be accessed this way as if we were in the actual object.

//Begin: Felipe Nogueira - AXAPTAHUT , Apr 9th 2018
[ExtensionOf(tableStr(ProjForecastOnAcc))]
final class ProjForecastOnAcc_Extension
{
[SysClientCacheDataMethodAttribute]
public display ProjGrantName grantName()
{
return ProjGrant::findByGrantId(this.ProjGrantId).GrantName;
}
}
//End: Felipe Nogueira - AXAPTAHUT , Apr 9th 2018

X++ Executing Table methods from Augmented classes

This feature allows us to access these new methods as if they were located in the original table wherever a buffer is created. The next code is a non-related Class making use of the new Display Method on the Augmented class, notice line 12 of the following code:

//Begin: Felipe Nogueira - AXAPTAHUT , Apr 9th 2018
class ProjForecastOnAcc_Ext_Test
{
static void main(args args)
{
ProjForecastOnAcc forecastOnAcc;
while select forecastOnAcc
where forecastOnAcc.ProjGrantId
{
info(strfmt("%1 - %2",
forecastOnAcc.ProjGrantId,
forecastOnAcc.grantName()));/*New method on ProjForecastOnAcc_Extension*/
}
}
}
//End: Felipe Nogueira - AXAPTAHUT , Apr 9th 2018

Form usage of display methods from Augmented classes

The way of mentioning the extended methods on Forms is still the same as in the old trick. You must have the correct DataSource, then insert the full name of the Augmented Class together with the desired display method name to the field’s property “Data Method”, like this:

  • DataSource: ProjForecastOnAcc
  • DataMethod: ProjForecastOnAcc_Extension::grantName

ExtensionOf1

If done correctly, this solution should work without any issues.

Follow us and get exclusive AX DEV content weekly

Hope it might be helpful,
Thanks,
Felipe Nogueira


Dynamics 365 Table browser Extension for Google Chrome

I was trying to export an Excel file from the VS Table browser, and it does not work, So I found this very cool Google Chrome Extension, Table Browser Caller for D365FO.

it’s very easy to install and use it.

After adding the extension, there is a new button on the right side of the URL field:tbBrwExt5

The button opens this form and on the “Config” tab you can Add the environment URL:

tbBrwExt6

After that you can search for an AX Table

tbBrwExt1tbBrwExt2

And open the Table Browser in your navigator.

tbBrwExt4

The extension also has a cool feature which is a table list with some info about them.

tbBrwExt3

Add Google Chrome Extension.

Follow us and get exclusive AX DEV content weekly

Hope it might be helpful,
Thanks,
Felipe Nogueira

Customizing Hierarchical Grid Common (Project WBS Grid) Dynamics 365

Hello DAX DEV,

I recently was given a task which the purpose was to disable some fields, buttons and change the calculation of the Project WBS Hierarchical Grid Control in Dynamics 365.

With the requirement of using Extensions and Overlaying and not customizing any SYS objects, the following topics explain a little bit about the necessity, its implications and how it turned out to be possible.

The WBS form Path is: Project management and accounting > Projects > All projects > PLAN (Button Group) > Work breakdown structure (Menu item button)

WBS Original

The highlighted control is not a regular Grid, it is a Hierarchical Grid Common. After debugging it a lot, I found out that the grid is almost entirely controlled by a JavaScript file mentioned on the properties of this Grid control:

Property box Original

Note issue#1: JS path property cannot be altered on this form nor on a form extension, It’ll always pop up this warning and cancel the operation:

errorJS

Note issue#2: It is impossible to overwrite the “Object” Property on a display menu item extension, It’ll always pop up this warning:

MenuItemDisplayError

Scenario difficulties:

  1. As mentioned, it is a requirement that all the changes are limited to new objects and/or extensions only, we cannot customize existing elements from MS Models.
  2. All Grid calculations happen on this JavaScript file, not on any X++ based Object.
  3. The Proj WBS Form and its extension do not allow any change to the property  “JavaScript Extension file” on the Hierarchical Grid Common  Issue#1.
  4. It is impossible to overwrite the Object Property of a display Menu Item Extension Issue#2.
  5. Javascript files are stored in the Application explorer as Resources and Microsoft did not release yet the functionalities of extensions or overlaying for Resources.

Solution :

  1. Duplicate the JS file,  with the same code but with a different name.
    • Further changes to the behavior of the Grid will be manipulated in this JS file.
  2. Duplicate the form & Create a new Menu Item Display for it.
    • In this new form duplicated from “ProjWorkBreakdownStructure” , find the Hierarchical Grid and Change its property “Javascript Extension Files” to your new JS resource name.
      • Issue 1, Only by duplicating the form AX will allow the user to alter the “Javascript Extension Files” property of the Hierarchical Grid Common control.
      • Issue 2, By default, the property object cannot be altered on a Display Menu Item extension, so a new menu item is needed to access the duplicated form.
  3. Overlay the Init Method of the original Sys Form
    • Create a new “FormHelper” class, and overlay the init Method from Form ProjWorkBreakdownStructure, then use X++ to get the args object from the Original Form execute the form methods run* and close, Then open the menuItem of the duplicated form and send the original args object to it.
      • (*) It is indispensable to execute the method Run before closing the original form, so AX won’t crash.

class ProjWorkBreakdownStructureFormHelper
{
/// <summary>
/// Method closes ProjWorkBreakdownStructure and opens the
/// custom form newProjWorkBreakdownStructure with the same args.Record()
/// </summary>
/// <param name="args"></param>
[PostHandlerFor(formStr(ProjWorkBreakdownStructure), formMethodStr(ProjWorkBreakdownStructure, init))]
public static void ProjWorkBreakdownStructure_Post_init(XppPrePostArgs _args)
{
Object formRun = _args.getThis();
Args args = formRun.args();
formRun.run();
formRun.close();
new MenuFunction(menuItemDisplayStr(newProjWorkBreakdownStructure),MenuItemType::Display).run(args);
}
}

  1. Alter the new JS file to perform the changes needed. In my case they were:
    • Removing 3 fields from the GRID: 
      • Around line 1300 of the JS file, there is a function called “getColumns” where the object “columnsArray” is located. This object can be manipulated and controls the Columns visibility and order

WBSCollumnsArray

    • Removing 2 Buttons from Grid’s Action pane:
      • Close to line 1500 of the JS file there is a function called  “_initToolbarContainer” that receives an object “container”, this container controls the buttons visibility and order.

wbsToolbars

    • Altering the Grid’s calculation on field changed: 
      • Approximately at line 525 of the JS file, there is a function called “cellValueChanged” that is executed whenever there’s a data modification on any field of the Grid, This function has a switch case with one separated case for each field. All the data calculation and grid responsiveness happen here, so any change in the logic needs to be done here. 

WBSCalculationJS1

      • Perform the change on the Grid’s calculation by manipulating the new JS file:
      • Some of the cases of the switch case trigger a calculation of values. To do the required modifications it was necessary to change those cases, comment some specific lines and call the newly created function “calcResourceNum” that unifies the calculation with the expected calculation rule.

WBSCalculationJS2

After altering the JS file, the behavior of the Grid was exactly as expected, the unnecessary fields and buttons were removed, and the new calculation rule was placed.

Developer important note – Minor Threat to MS HotFixes: 

There is a drawback to this solution, from my perspective it is currently insoluble, that is: Because it was impossible to manipulate the JS path property on the Form Extension Issue#1 and it is also impossible to alter the Object Property of a Display menu Item Issue#2, It was necessary to create a form duplicate and a PostHandler to catch the regular form Init method, close it and open the duplicate Form by code with the same arguments.

With this solution in place, if Microsoft releases a new hotfix that includes changes to this form, at first, the change will not take place automatically. It will only take place if the HF changes are also replicated manually to the duplicated form or after removing the old duplicate and creating a new duplicate with the same name, Doing step 2 of the solution again to catch up with the latest MS HotFix changes to this form.

Follow us and get exclusive AX DEV content weekly

Thank you for reading, I hope it had been helpful,
Felipe Nogueira

Display Method on Sys Tables Using Overlaying D365

Hello DAX DEV,

Before going to the trick I’ll explain a little bit about Overlaying and extensions on Ax Objects:

Intro About Extensions:

One of the great feature added to Microsoft Dynamics 365 is the concept of Overlaying and Extensions, available for most objects, like tables, forms, data types, menu items, queries and so forth.

To guarantee the integrity of the original code from Microsoft many AX objects can now have their behavior or properties overwritten by this new set of elements instead of manipulating the actual Sys Code.

It is still possible to customize original objects, but this is not a best practice, so much so that most D365 Development Administrators have disabled this possibility on DAX DEV servers, to force developers to manipulate Sys Objects only by extensions and overlaying.

Tables extensions are very useful to create structural changes, like altering field dataTypes, Labels, adding new fields, creating relationships, indexes, events interceptions and so on, but you cannot create or alter table methods on a table extension, so when this is required, the limitation presents a problem.

ProjTableExt
The solution consists on creating a new Static Class, that will work as source code for your Sys Table and here’s an example of a display method for table ProjBudget that will be used later on ProjBudget Form [Extension].

SOLUTION

THERE'S A NEW AND BETTER WAY OF DOING THIS. CHECK NOW ON AXAPTAHUT
 Augmented classes on Tables [ExtensionOf]
  1. First, you need to create a new Static class that will act as the extended source code for the table using the naming pattern TableName_Extension (trick: you can add project suffixes to the  class name but it is important that the class be static)
  2. Then add a public static display method receiving the table as a parameter.
    • static class ProjTable_Extension
      {
      [SysClientCacheDataMethodAttribute(true)]
      public static display DirMemo projValGroupId(ProjTable _projTable)
      {
      DirMemo ret;
      container conGroupId;
      ProjValProjCategorySetUp projValCategorySetup;
      while select GroupId from projValCategorySetup
      where projValCategorySetup.ProjId == _projTable.ProjId
      {
      conGroupId += projValCategorySetup.GroupId;
      }
      ret = con2Str(conGroupId,",");
      return ret;
      }
      }
  3. Then, on the Form or Form extension, that has that table, you’ll add the display method in a slightly different manner than usual. After creating field control where it necessary, you should set the correct “Data Source” property and here’s another trick, you should input an expression to the Data Method property mentioning the static class and the static display method you’ve created
    • Data Method Pattern: TableName_Extension::DisplayMethodName
    • Here’s the example:
      • DataSource: ProjTable
      • DataMethod: ProjTable_Extension::projValGroupId
    • DisplayonFormsExt

After performing those steps, your display method should work without any issues.

Hope it might be helpful,


Follow us and get exclusive AX DEV content weekly

Thanks,
Felipe Nogueira

https://gist.github.com/FNogger/5443793f18676e6e77e150e61ed6b1b8.js

MS D365 Development certifications [WHAT TO STUDY]

Hello DAX DEV,

This post has a PDF with all exams topics and a few explanations about what to study to get the new set of Development certifications that MS Published. I synthesized information from https://www.microsoft.com/en-us/learning in a PDF document to guide the studies, with info about:

  1. MB2-715Customer Engagement Online deployment
  2. MB2-716Customization and Configuration
  3. MB6-894Development, Extensions, and Deployment for MS D365

Get the PDF MS D365 Development certifications

NOTE: Other PDF documents are being produced,  with more content about the exams, they’ll be posted in the following weeks, So stay tuned!

Follow us and get exclusive AX DEV content weekly


Exam MB6-890: Dynamics AX Dev Intro [Dynamics 365 / Ax7] Usefull Info & links

Get ready for AX 7 Dev Intro Certification!

Hello DAX DEV,

I took the exam MB6-890 last year Jun 2017 and, in my opinion, if you are an experienced AX2012/09 developer,  You will need to study diligently some concepts that I will be mentioned here in this post. But I don’t think the exam is too complicated if you worked with the older versions of AX you’re probably familiar with at least 40%+ of the exam’s content, things like  X++ Code flow Read & write, Security Objects and some core falimiar transaction tables & classes did not change, and they will be mentioned, so it’s worth taking a look again.

If you are not familiar with the older versions and  you wish to take the exam, I’d advise you to take the Full MS course.

Although the most recognized tables & classes structures barelly changed in this new version, there are some major changes in the whole architecture of the ERP, many new tecnologies are involved. there’s a completelly different way of deploying and maintaining the development, might take a while to get used to, but in practice it is simple.

Considerable diferences when developing for AX2012 & AX07

First and most important change for us developers is the new environment [IDE], that is completelly on Visual Studio, with many new functionalities, with t new way of deploying and tranfering code between environments.

Changed & Extinct concepts: 3 concepts were completely revised.

  1. There are no more XPO’s files [Check ax07 Deploy]
  2. No more Morphx [Check Form Patterns]
  3. No more X++ Jobs(*) .

(*): If you want to do execute some specific code, you’ll need to create a class with a main method , place your code  in the main method and set the class as the default startup Object of your project and set your project as start up project of your solution, then run the solution, which will execute the class. [Check links: 1. Getting started   & 2. Debugging without a startup object]

New Concepts

Microsoft was very wise when building this new ERP,  All code was remastered in order to be in accordance with the most recent implementation norms & patterns. The objects extensions allow the developer to alter objects appearence & behavior by adding code to extension files, without changing the Original source file, In run time both the Original File and all the overlayering extentions will be read. This new architecture facilitates merges, HotFixes, MS updates and protects SYS code.

Important concepts  to study, (what I believe to be the most important):

  1. Models and Packages. (Deploy & Import processes, no more XPOs)
  2. Overlayering Extensions.
  3.  Form Patterns.

A good knowledge of these 3 topics will come handy not only for the exam but also to avoid problems with deployments once you’re developing. So invest some time to fully grasp the whole concept.

Apart from the MS online material, I studied other sources. Here are all 8 helpful links:

1 – Brief outlook of the exam.
2. MBS Parter Course. (Full MS course, A valid MS credential is needed)
3 – X++ Code Flow.
4 – Form Patterns.  (Usefull post to understand the new form design architecture)
5 – Customization overlayering extensions.
6 – Microsoft Doc About Models.
7 – Microsoft Doc About Projects.
8 – Packages, models, and projects. (Succinct and direct info)

AxaptaHut Note: Our purpose is to feed the community with good & usefull information, so if you have good info about this subject and you feel it is missing here, do not hesitate, SHARE WITH US!! let’s be collaborative, all AX community is thankfull.

Good luck to all of those who will take the exam and leave your comments below.
 

Follow us and get exclusive AX DEV content weekly

Thanks,
Felipe Nogueira.

Find Method Generator AX2012

Hello DAX DEV,

Here’s a tool to automatically create the Find method on tables based on the Primary Unique index, it appears in the context menu of the code editor in Ax 2012.

This is how it works, first, you have to make sure your table has a unique index:
carTable

newMth

Then you create a new method on the table, select all the text and execute the function FindByPrimaryIndex in the Context menu.

Script

This new tool will pop-up dialogs, as the images below, to each unique index in a loop in case there’s more than one until the developer chooses one of the indexes [By pressing “Yes” on the dialog].

If there are no unique indexes, or the user rejects all the possible indexes, the solution will propose to create the find by the RecId field.

1.Finddialog

2.Finddialog2

3.Finddialog3

I’ve generated the three possibilities of Find methods for this scenario and the results are:

find by index CarIdx_UniqueId

/// <summary>
/// Finds the specified record in the <c>CarTable</c> table.
/// </summary>
/// <param name="_carId">
/// The CarId of the <c>CarTable</c> record to find.
/// </param>
/// <param name="_forupdate">
/// A Boolean value that indicates whether to read the record for update; optional.
/// </param>
/// <param name="_concurrencyModel">
/// The table selection ConcurrencyModel; optional.
/// </param>
/// <returns>
/// A record in the <c>CarTable</c> table; otherwise, an empty record.
/// </returns>
// Begin : Axaptahut, DevTools
public static CarTable find(AccountNum _carId, boolean _forupdate = false,
ConcurrencyModel _concurrencyModel = ConcurrencyModel::Auto)
{
CarTable carTable;
carTable.selectForUpdate(_forupdate);
if (_forupdate && _concurrencyModel != ConcurrencyModel::Auto)
{
carTable.concurrencyModel(_concurrencyModel);
}
select firstonly carTable
where carTable.CarId == _carId;
return carTable;
}
// End: Axaptahut, DevTools
view raw Find.CS hosted with ❤ by GitHub

find by index CarIdx_UniqueCombination

/// <summary>
/// Finds the specified record in the <c>CarTable</c> table.
/// </summary>
/// <param name="_carId">
/// The CarId of the <c>CarTable</c> record to find.
/// </param>
/// <param name="_brand">
/// The Brand of the <c>CarTable</c> record to find.
/// </param>
/// <param name="_forupdate">
/// A Boolean value that indicates whether to read the record for update; optional.
/// </param>
/// <param name="_concurrencyModel">
/// The table selection ConcurrencyModel; optional.
/// </param>
/// <returns>
/// A record in the <c>CarTable</c> table; otherwise, an empty record.
/// </returns>
// Begin : Axaptahut, DevTools
public static CarTable find_Combination(AccountNum _carId,
EcoResAttributeTypeName _brand, boolean _forupdate = false,
ConcurrencyModel _concurrencyModel = ConcurrencyModel::Auto)
{
CarTable carTable;
carTable.selectForUpdate(_forupdate);
if (_forupdate && _concurrencyModel != ConcurrencyModel::Auto)
{
carTable.concurrencyModel(_concurrencyModel);
}
select firstonly carTable
where carTable.CarId == _carId
&& carTable.Brand == _brand;
return carTable;
}
// End: Axaptahut, DevTools

find by RecId

/// <summary>
/// Finds the specified record in the <c>CarTable</c> table.
/// </summary>
/// <param name="_recId">
/// The RecId of the <c>CarTable</c> record to find.
/// </param>
/// <param name="_forupdate">
/// A Boolean value that indicates whether to read the record for update; optional.
/// </param>
/// <param name="_concurrencyModel">
/// The table selection ConcurrencyModel; optional.
/// </param>
/// <returns>
/// A record in the <c>CarTable</c> table; otherwise, an empty record.
/// </returns>
// Begin : Axaptahut, DevTools
public static CarTable findRecId(RecId _recId, boolean _forupdate = false,
ConcurrencyModel _concurrencyModel = ConcurrencyModel::Auto)
{
CarTable carTable;
carTable.selectForUpdate(_forupdate);
if (_forupdate && _concurrencyModel != ConcurrencyModel::Auto)
{
carTable.concurrencyModel(_concurrencyModel);
}
select firstonly carTable
where carTable.RecId == _recId;
return carTable;
}
// End: Axaptahut, DevTools
view raw findRecId.cs hosted with ❤ by GitHub

To add this functionality the following method must be placed in the Editor Scripts class.

GET FREE SOURCE CODE NOW

Follow us and get exclusive AX DEV content weekly

Hope it might be helpful,
Thanks,
Felipe Nogueira